Showing posts with label dyed. Show all posts

Saturday, August 18

DIY: Dyed and Studded Pt. 3


So it's time for another dyed and studded piece. I'm still surprised how popular they still are. I think it's because it's something that can be extremely individual. You can't really walk into a store at the mall and find truly rad dyed and studded shorts, without paying up the ass. Anyways, I decided to do the double dip dye, shredded and studded, all in one. 


First off, gather materials. Choose two color dyes that compliment each other, I chose purple and pink. Grab some studs, a cup of salt (not pictured), and a bottom clothing hanger. Also something that is VERY important, use bleached or white denim. I bleached these from black. Yeah, they were black. All you do is get a bucket, fill it 1/4 of the way with bleach, the rest water, dump, wash, done. Easy as pie, I swear.


Next, get your dye bath ready with the salt and powder. It's up to you which end to start on. Fold your shorts and hang them, making sure that they are already dripping wet. Then, dip them about 1/3 of the way. You can dip them a little more, but only for a minute at most. 


Alright, you have to leave your shorts hanging for a while as they soak. It's up to you how you do this, but I used a bra strap to hanging to suspend the shorts. It worked so well. I could adjust the strap to make is shorter or longer. 


Rinse out the dye from your shorts, or an easier way is to just immediately throw them in the washer. What results is the picture below: an ombre effect.


Do the same exact thing, but upside down. And with the other dye. Remember to wet your shorts before dying them to help the ombre effect as well as the dye to have a better reaction with the fabric. With this step, however, leave a little space in the middle. It should be somewhat white in the middle. Don't worry, when you throw them in the washer again, the white part is no longer there and the two colors mix, creating that ombre effect from pink to purple.


For the slashed parts, I can't stress enough to make sure your shorts have long pockets. Otherwise your underwear will be showing and I don't want anymore hoochie mamas walkin' around because of me! 


Use an exacto knife to cut a small, parallel incision in the shorts. Cut them about an inch and them rip them carefully. I promise the shorts wont rip in an awkward direction, it rips straight. But be careful! Don't rip off the whole leg!


What results is this. Yeah, it might look bland now, but guess what the next step is? THROW THEM IN THE WASHER! Yeah, sorry about the excess water usage. 


I studded the pocket (which is almost a classic to me) and there ya go! Some ombre studded/ripped shorts. I know the picture below doesn't show the color difference to well, but look at the picture above. That's what they really look like. Other color suggestions I have are blue/green, red/pink, yellow/light blue, pretty much any two pastel colors, blue/purple and those are just the basic colors! You can really let your mind go with this one. Have fun!


Song of the Day: "Start Me Up" by the Rolling Stones

Wednesday, July 11

who gives a fuck about an oxford comma?


Some photos from the past week. I went to the American Apparel flea market which was so conveniently located down the street from where I work. I ended up going twice and finding a ton of good deals. Also some studded nail decals from Target (yeah, Target) as well as my ticket for the Rose Bowl Flea Market. Best flea market around, especially if you like to haggle. I just went for litereally 20 minutes looking for one vendor in particular. It's these two hispanic guys that sell a TON of rad vintage shirts for $8 and cut-offs of all different colors for $10. I'm talking about what's in YOUR closet that you bought for $60. The shirts are just amazing. Also these black platform oxfords are being sold by yours truly. I'm selling them on ebay for $20 starting bid. If you like what you see, go check 'em out.


The oxfords are on sale HERE.


Song of the Day: "Oxford Comma" by Vampire Weekend

REMINDER: blog URL will be changing from lerebellesdoux.blogspot.com to lerebelledoux.blogspot.com we are dropping the 's'!

Saturday, July 7

DIY: Dyed and Studded Shorts Pt. 2

So for the second dyed and studded shorts DIY segment, I chose circle studs and tried to find another creative place to put them. 


Materials first, as always. Get good dye, good shorts, circle studs, and some things that weren't pictured but are absolutely necessary are fabric glue and 1/2 a cup of salt.


Pre-soak your fabric in water. It doesn't matter hot or cold, just make sure they're sopping wet.


Afterwards, get BOILING hot water and put it in a bucket. Stir in they dye and salt until both are completely dissolved. The salt helps the fabric to retain the dye color after washes. Soak your shorts in for 30 minutes and constantly stir. Another step that's important is to rinse out your shorts. You can do this by rinsing your shorts under a tap or hose, but a much easier way is to throw them in the washer.


After your shorts are perfectly dyed and dried, find where you want to put the studs. Plan out how many rows you'll need for where. I referred back to the first dyed and studded segment for some good ideas. 


Again, I chose the inside pocket. It seems like a future classic, or something. You really can't go wrong with the inside pocket and you'll see that many studded shorts have the inside pockets studded.


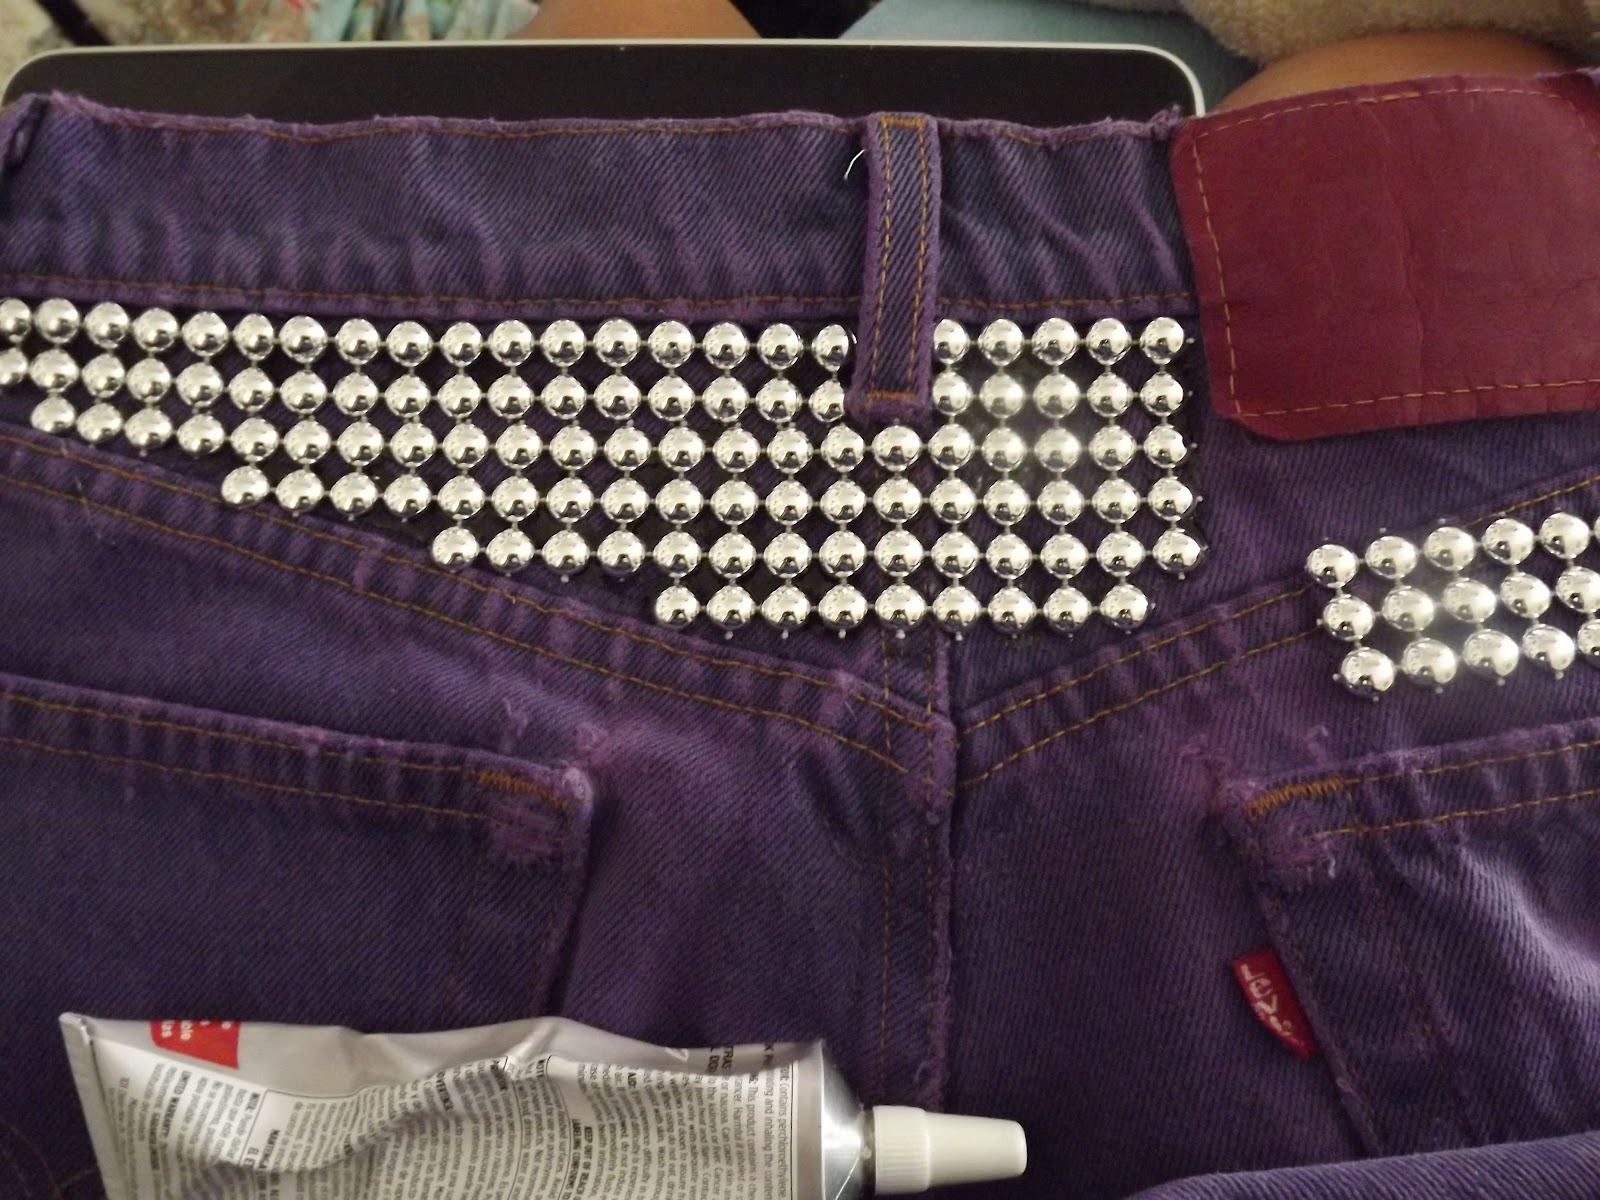
I also chose the back top yoke to stud. Look up yoke in the fashion dictionary if you keep thinking about eggs. I basically cut a rough outline with the studs. You can see it especially in the picture below, where I cut spaces for the Levis tag and belt loops. 


Start glueing your studs in place. Take it a section at a time and don't be afraid to cut apart your outline. The smaller the section you glue, the better the studs will fit in place. It also gives it more time to dry without moving around too much.


And there you have it! some circle studded shorts. Be aware that if you plan on putting them on other parts of the shorts, you HAVE to make sure to use appropriate sized circle studs. I can't stress this enough. If you wanted to place circle studs along the front leg of the shorts, these studs would be way to small to fit in. You would need far bigger circle studs.


So for the second dyed and studded DIY, I realized it's pretty much the same thing as the first part. Find good denim shorts, good dye, good studs, and find a rad place to put it all. I realized if I'm going to do this again, I will definitely be doing the half dyed shorts like several of the ones below. So stay tuned for more DIY segments, and if you want to easily see any, you should have noticed the DIY tabs on the top of the page. Have fun STUD-ing!!


Song of the Day: "Le temps de l'amour" by Francois Hardy