So for the second dyed and studded shorts DIY segment, I chose circle studs and tried to find another creative place to put them.

Materials first, as always. Get good dye, good shorts, circle studs, and some things that weren't pictured but are absolutely necessary are fabric glue and 1/2 a cup of salt.

Pre-soak your fabric in water. It doesn't matter hot or cold, just make sure they're sopping wet.

Afterwards, get BOILING hot water and put it in a bucket. Stir in they dye and salt until both are completely dissolved. The salt helps the fabric to retain the dye color after washes. Soak your shorts in for 30 minutes and constantly stir. Another step that's important is to rinse out your shorts. You can do this by rinsing your shorts under a tap or hose, but a much easier way is to throw them in the washer.

After your shorts are perfectly dyed and dried, find where you want to put the studs. Plan out how many rows you'll need for where. I referred back to the first dyed and studded segment for some good ideas.

Again, I chose the inside pocket. It seems like a future classic, or something. You really can't go wrong with the inside pocket and you'll see that many studded shorts have the inside pockets studded.

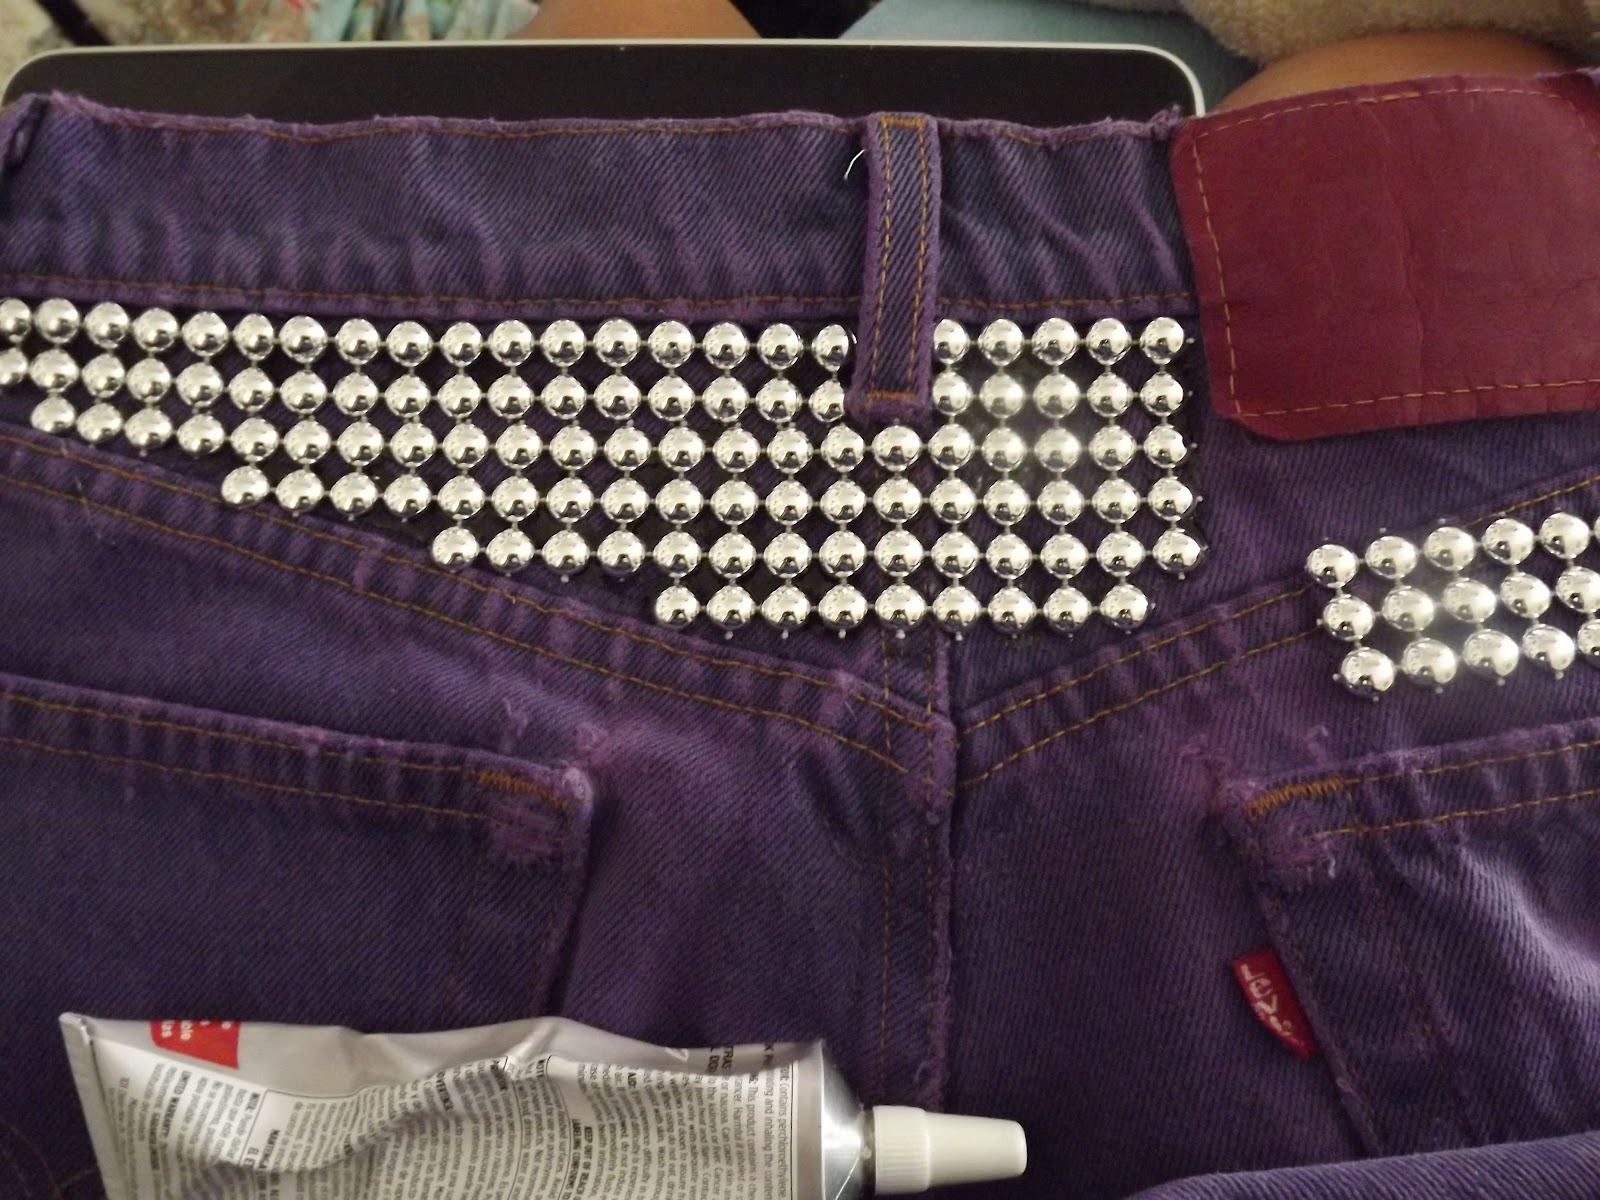
I also chose the back top yoke to stud. Look up yoke in the fashion dictionary if you keep thinking about eggs. I basically cut a rough outline with the studs. You can see it especially in the picture below, where I cut spaces for the Levis tag and belt loops.

Start glueing your studs in place. Take it a section at a time and don't be afraid to cut apart your outline. The smaller the section you glue, the better the studs will fit in place. It also gives it more time to dry without moving around too much.
And there you have it! some circle studded shorts. Be aware that if you plan on putting them on other parts of the shorts, you HAVE to make sure to use appropriate sized circle studs. I can't stress this enough. If you wanted to place circle studs along the front leg of the shorts, these studs would be way to small to fit in. You would need far bigger circle studs.


So for the second dyed and studded DIY, I realized it's pretty much the same thing as the first part. Find good denim shorts, good dye, good studs, and find a rad place to put it all. I realized if I'm going to do this again, I will definitely be doing the half dyed shorts like several of the ones below. So stay tuned for more DIY segments, and if you want to easily see any, you should have noticed the DIY tabs on the top of the page. Have fun STUD-ing!!
Song of the Day: "Le temps de l'amour" by Francois Hardy
great
ReplyDelete